Hey everyone, it is me again, Dan, welcome to our recipe page. Today, I will show you a way to prepare a distinctive dish, buttermilk scones. It is one of my favorites food recipes. This time, I will make it a little bit tasty. This is gonna smell and look delicious.
Delicious fresh scones delivered, or bake using our mixes. Real fresh scones, or bake using easy mix in just minutes. We have clotted cream Mixes, batters, frosting and more.
Buttermilk Scones is one of the most favored of recent trending meals on earth. It’s enjoyed by millions daily. It is easy, it is fast, it tastes delicious. They are fine and they look fantastic. Buttermilk Scones is something which I have loved my whole life.
To begin with this particular recipe, we have to first prepare a few components. You can cook buttermilk scones using 12 ingredients and 13 steps. Here is how you cook it.
The ingredients needed to make Buttermilk Scones:
- Prepare Dough
- Prepare 3 cup All-purpose flour
- Get 1/3 cup Sugar
- Prepare 2 1/2 tsp Baking powder
- Prepare 1/2 tsp Baking soda
- Prepare 3/4 tsp Salt
- Make ready 6 oz Butter, unsalted, cold, cut into small pieces
- Make ready 1 cup Buttermilk
- Prepare 1 tbsp Lemon zest
- Prepare Sugar Topping
- Get 2 oz Butter, unsalted, melted for brushing
- Prepare 1/4 cup Sugar, for dusting
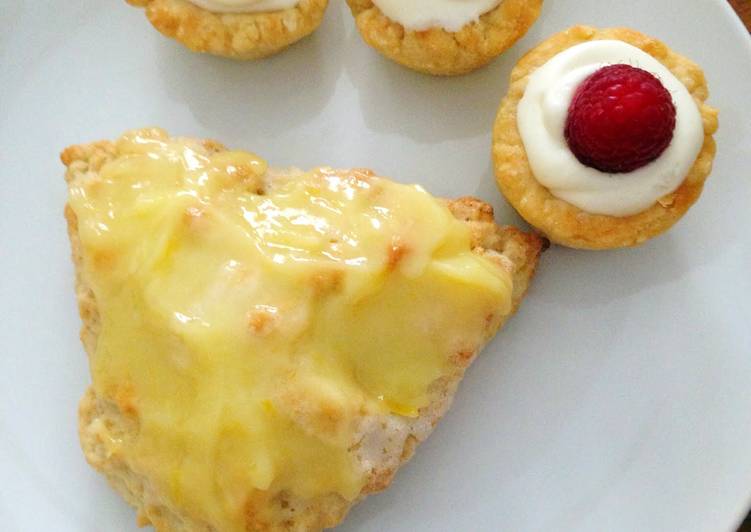
They are the perfect tea time or brunch treat served with thick cream and jam. Stir flour, baking powder, salt and sugar together in a mixing bowl. Rub flour into the mixture until it resembles rough breadcrumbs. The buttermilk in these scones only gives them a slight tang, all the better to enjoy the jam and cream on top, but is also what yields such a melting, tender crumb.
Steps to make Buttermilk Scones:
- Position the oven racks to divide the oven into thirds and preheat to 425?F.
- In a medium bowl, combine the flour, sugar, baking powder, baking soda, and salt with a fork.
- Add the cold butter pieces and, using your fingertips (or pastry blender or two knives), work the butter into the dry ingredients until the mixture resembles course cornmeal. Its okay if some larger pieces of butter remain; it makes the scones flakier.
- Pour in the buttermilk, add the zest, and mix with a fork until the ingredients are just moistened - you'll have a soft dough with a rough look. (If the dough looks dry, add another tablespoon of buttermilk.)
- Gather the dough into a ball, pressing it gently so it holds together, turn it out onto a lightly floured work surface, and knead it very briefly (about a dozen turns).
- Cut the dough in half.
- Roll one of the dough halves into a 1/2-inch thick circle about 7 inches across.
- Brush the dough with half of the melted butter and sprinkle with 2 tablespoons of the sugar.
- Cut the circle into 6 triangles and place on a baking sheet.
- Repeat steps 7-9 with the other half of the dough.
- Bake the scones for 10 to 12 minutes, until both the tops and bottoms are golden.
- Transfer the scones to a rack to cool slightly. These are best served warm but are just fine at room temperature.
- STORING: If you are not going to eat the scones the day they are made, wrap them airtight and freeze; they'll stay fresh for a month. To serve, defrost the scones at room temperature in their wrappers, then unwrap and reheat on a baking sheet for 5 minute in a 350?F oven.
These scones do look a bit. Knead just until it comes together more will make the scones chewy. Put the flour, baking powder and a pinch of salt in a large bowl and mix together. Add the butter and rub in until the mixture resembles fine. Place the uncooked buttermilk scones on a tray lined with baking paper, (spaced well apart) and freeze until solid.
So that’s going to wrap this up for this special food buttermilk scones recipe. Thanks so much for reading. I am sure that you will make this at home. There’s gonna be more interesting food at home recipes coming up. Don’t forget to bookmark this page in your browser, and share it to your family, friends and colleague. Thank you for reading. Go on get cooking!